Sollten Sie ein Heimwerker sein und es lieben, sich gut auf Ihr Auto zu kümmern, könnten Sie gerne die Bremsblutung in Ihrer Garage durchführen. Es würde helfen, wenn Sie viele Aspekte in Betracht ziehen, wie die perfekte Größe des perfekten Bremsbluts .
Dieser Blog erstellt die wesentlichen Informationen und einen vollständigen Leitfaden zu einfachen und effektiven Bremsblutungen. Bitte scrollen Sie nach unten, um weitere Informationen zu erhalten!
Warum sollten wir bremsen?
schlechten Rotor oder einen längeren Bremsabstand geändert haben.Das, was zählt, ist, wie diese Wartung angemessen durchführt!
Bremsblutschlauchgröße: Wie kann man die Bremsen richtig bluten?
Nachdem Sie Ihr Fahrzeug sicher montiert haben, besteht der nächste Schritt darin, die Reifen zu entfernen. Es ist einer der entscheidenden Schritte.
Der folgende Inhalt deckt die detaillierte Richtlinie ab, die Sie befolgen können, um die Reifen sicher zu entfernen.
- Lösen Sie und nehmen Sie die Nüsse aus Ihren Reifen heraus.
- Seien Sie vorsichtig, wenn Sie Reifen und Räder entfernen.
- Sie aus der Arbeitsseite herausholen.
- Zu diesem Zeitpunkt sehen Sie die Bremssattelbaugruppe und den Rotor an jeder Bremse. Es ist ein Zeichen für den nächsten Schritt!
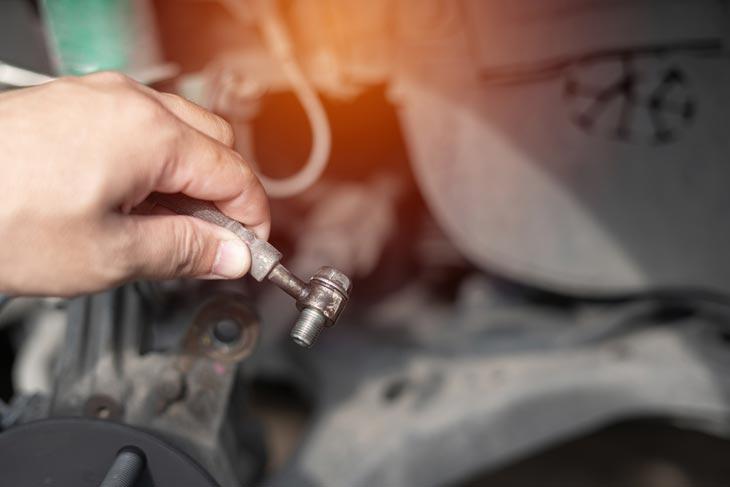
SCHRITT 3 - Die Blutenschraube abschrauben
- You can cover the bleeders opening with vinyl tubing, but a piece of plastic tubing is still fine. You should wear work gloves to protect your hands during this step.
- Using the hose to connect the other end with an empty bottle or jar is time. Of course, you need to choose a fit hose size for brake bleeding (find the details in the FAQ section).
- Make sure the fluid is in before the brake bleeding process. So, the trapped air can easily and smoothly bubble into the plastic bottle or jar you already prepared!
Step 5 - Activate The Bleeder Valve And Connect With The Brake Pedal
Step 6 - Repeat The Process On Each Brake
- The common bleeding order is:
- Passenger rear brake
- Driver rear
- Passenger front
- Driver front
- Repeat what we instruct in step five on each brake. It is important to check the fluid level. If it is lower or higher than the indicator line, you should adjust it to the standard level.
- Once you finish the bleeding process on all brakes, it is time for the reassembly procedure, including:
- Schließen Sie die Entlüftungsventile.
- Press down the brake pedal.
- Erfüllen Sie den Bremsremsreservoir.
- Die Reifen wieder zusammenstellen.
- Verringern Sie Ihr Fahrzeug, indem Sie den Aufzug einstellen.
- Ziehen Sie die Nüsse an.
- Wenn es Probleme wie schwammige Bremsen nach dem Blutungsprozess gibt, sollten Sie weitere Informationen überprüfen oder die professionelle Mechanik anrufen.
FAQs
Should You Bleed Brakes While Tires Are On?
We instruct you to remove all four wheels before bleeding brakes in the guideline above. However, the fact is that you can still carry out the process without doing it.
It is advisable to take out tires to avoid inconvenience while the brake bleeding process happens. There will be more space for you when the car is up in the air without wheels!
Abschluss
This blog shares the detailed guideline and the answers to one of the most common questions: the suitable brake bleeder hose size .
Hoffentlich finden Sie die genaue Größe der Werkzeuge und glätten den Prozess, damit Sie ein fantastisches Fahrerlebnis mit leistungsstarken Bremsen genießen können!